Adding a password
Step 1: In Excel, open the document you want to secure with a password.
Step 2: Save your file with the .xlsx extention and with the same file name but include (SECURED) or (PROTECTED) at the end of the file name. I.e. “Customer Data July Mail Out (SECURED).xlsx”. This will be explained in Step 5.
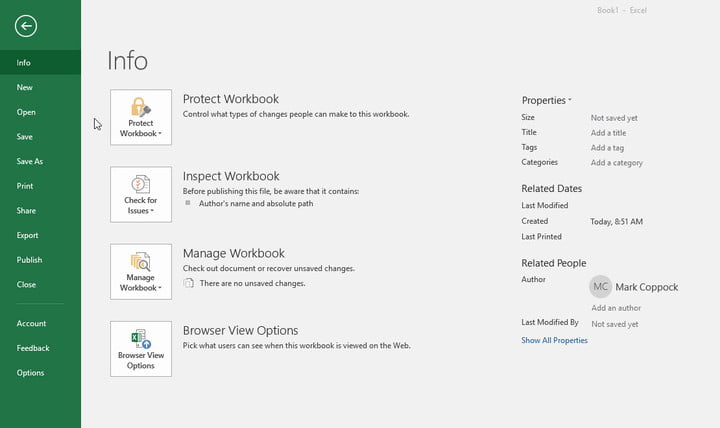
Step 3: Once saved, click File, followed by Info.
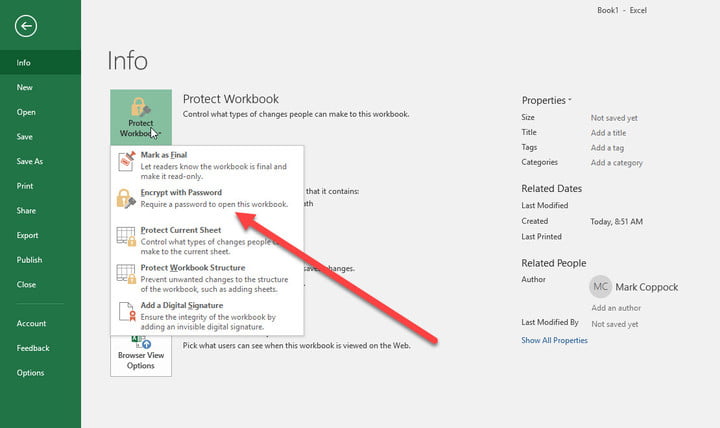
Step 4: Next, click the Protect Workbook button. From the drop-down menu, select Encrypt with Password.
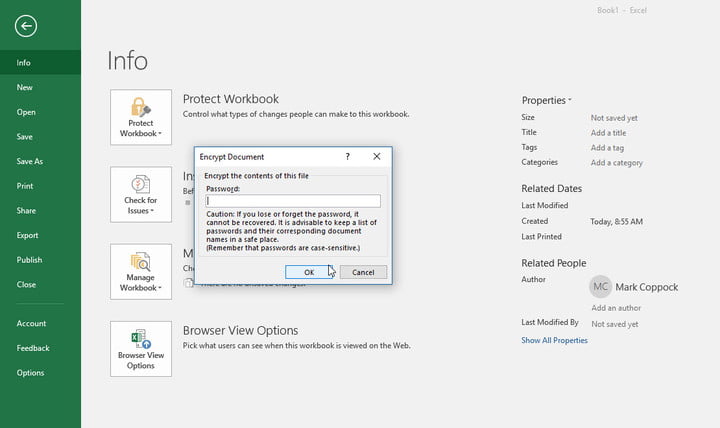
Step 5: Excel will then prompt you to type in a password. Pick one that’s complicated and unique and note it down in your password manager. Generate a secure password here: https://passwordsgenerator.net/
If your database contains especially critical data check your password isn’t already part of a brute force file here: https://haveibeenpwned.com/Passwords
When you use a (SECURED) or (PROTECTED) at the end of the file name, it’s not that important if you lose or forget the password. You can just go back to the earlier file.
Step 6: Once you have set your password, Save the file. Don’t skip this step as the password will not be applied otherwise.
Step 7: Close the file.
Step 8: Reopen the file and it will prompt you for your new password. Go ahead and type it or paste it in to test it works. it’s a good idea to do this before sending the file.
From now on, any time you try to open that file, Excel will prompt you to input your newly chosen password.
Note: This password only protects that individual document, not every Excel document on your PC. If you want all Excel files to have similar protection, you’ll need to password protect each file individually or look at more advanced protections.
If you want to see whether an Excel file has password protection or not, check out the Info tab for the document and look at the Protect Workbook section. It will tell you whether a password is required to open it or not.